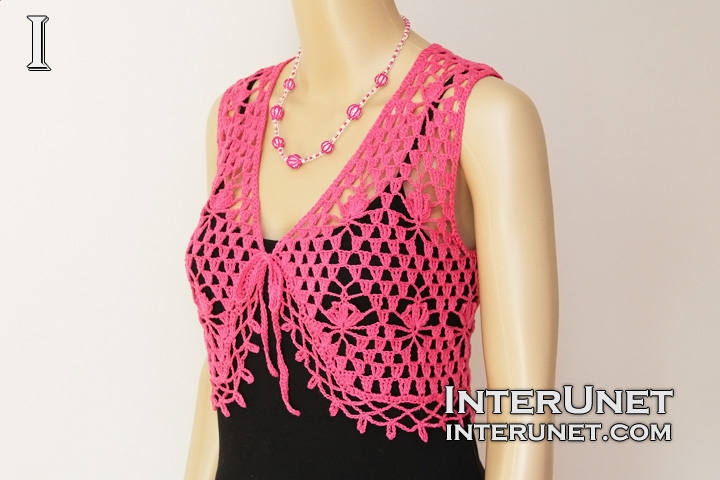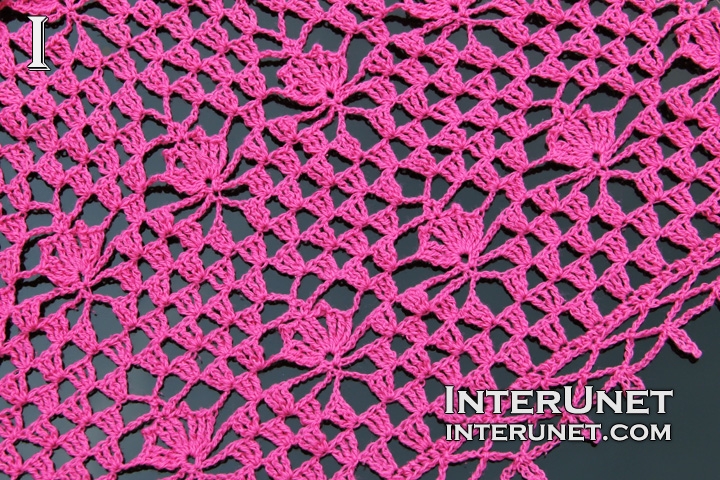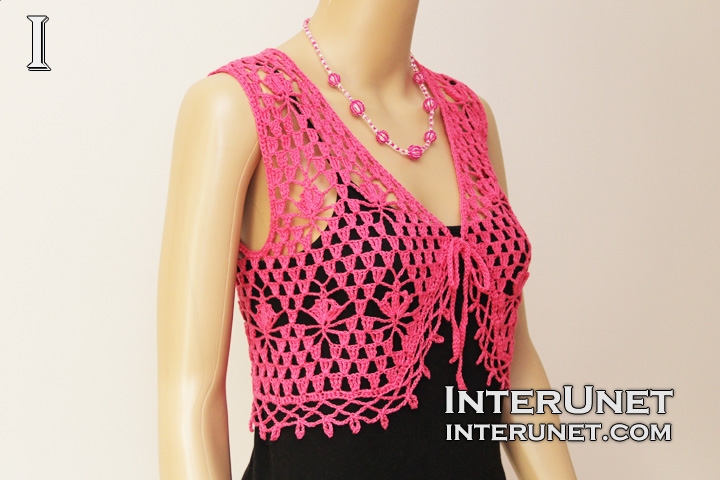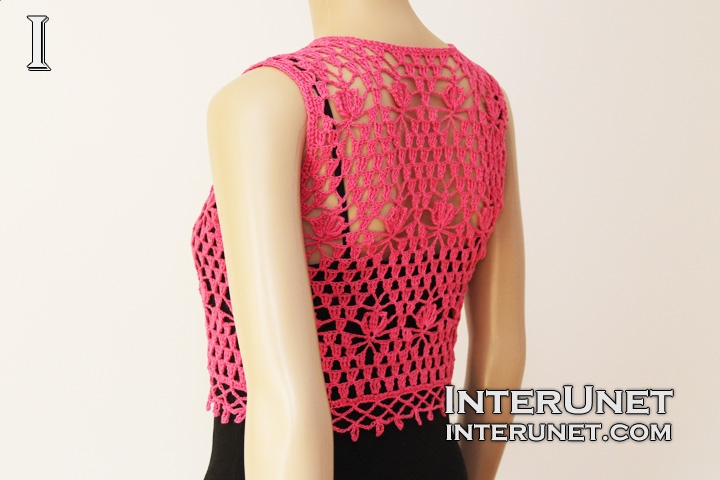
Yarn - Cotton pink thread super fine
Hook - 1 / 2.75 mm or other size hook needed for the gauge
Gauge - 23 chs go into about 4 inches (10 cm)
Bolero Size - XS
Complexity - Intermediate/ Advanced beginner

Lace pink bolero shrug crochet pattern
Step-by-step crochet instructions
First part of the video tutorial
Step 1
Crochet the bolero from the bottom to top.
Make a foundation chain of 146 chs or multiples of 16 chs plus 2 additional chains. I count all the loops including the loop on my hook.
Step 2
Body
Increase chs
1st row (wrong side) – h5ch, trc4 into 1ch, ch1, sk3, [trc3 into 1ch, ch1, sk3] to last 1ch; trc4 into 1ch + RC4
2nd row = 1st row
3rd row – h5ch, trc4 into 1ch, ch5, sk3, [trc3 into 1ch, (ch1, sk3, trc3 into 1ch) x 3, ch5, sk3] to last 1ch; trc4 into 1ch + RC4
4th row – h5ch, trc4 into 1ch, ch4, sk5, sc1, ch4, sk5, [trc3 into 1ch, (ch1, sk3, trc3 into 1ch) x 2, ch4, sk5, sc1, ch4, sk5] to last 1ch; trc4 into 1ch + RC4
5th row – h5ch, trc4 into 1ch, ch5, sk7, (sc1, ch3, sc1) into 1ch, ch5, sk7,[ trc3 into 1ch, ch1, sk3, trc3 into 1ch, ch5, sk7, (sc1, ch3, sc1) into 1ch, ch5, sk7] to last 1ch; trc4 into 1ch + RC4
6th row – h5ch, trc4 into 1ch, ch4, flower into arch of 3 chs, ch4, sk8, [trc3 into 1ch, ch4, flower into arch of 3 chs, ch4, sk8] to last 1ch; trc4 into 1ch + RC4
7th row – h5ch, trc4 into 1ch, ch1, sk3, [trc3 into 1ch, ch5, arch of 3chs into middle quadruple crochet between 2 picots of prev. row, ch5, sk picot and 6chs, trc3 into 1ch, ch1, sk3] to last 1ch; trc4 into 1ch + RC4
8th row – h5ch, trc4 into 1ch, [(ch1, sk3, trc3 into 1ch) x 2, ch4, sc1 into arch of 3chs, ch4, sk4, trc3 into 1ch] to last 8chs; ch1, sk3, trc3 into 1ch, ch1, sk3, trc4 into 1ch + RC4
9th row – h5ch, trc4 into 1ch, [(ch1, sk3, trc3 into 1ch) x 3, ch1, sk7, trc3 into 1ch] to last 12chs; (ch1, sk3, trc3 into 1ch) x 2, ch1, sk3, trc4 into 1ch + RC4
10th row = h5ch, trc4 into 1ch, ch1, sk3, [trc3 into 1ch, ch1, sk3] to last 1ch; trc4 into 1ch + RC3
Step 3
Front part
11th row (wrong side) – h4ch, trc1, sk3, trc3 into 1ch, (ch1, sk3, trc3 into 1ch) x 2, [ch1, sk3, trc3 into 1ch, ch5, sk3, trc3 into 1ch, (ch1, sk3, trc3 into 1ch) x 2] x 2; sk3, trc1 + RC3
12th row – h4ch, trc1, sk3, trc3 into 1ch, ch1, sk3, trc3 into 1ch, [ch4, sk5, sc1, ch4, sk5, trc3 into 1ch, (ch1, sk3, trc3 into 1ch) x 2] to last 4chs; sk3, trc1 + RC3
13th row – h4ch, trc1, sk3, trc3 into 1ch, ch1, sk3, [trc3 into 1ch, ch5, sk7, (sc1, ch3, sc1) into 1ch, ch5, sk7, trc3 into 1ch, ch1, sk3] x 2; trc1 + RC3
14th row – h5ch, trc3 into 1ch, [ch4, flower into arch of 3chs, ch4, sk8, trc3 into 1ch] x 2; sk3, trc1 + RC3
15th row – h4ch, trc1, [sk3, trc3 into 1ch, ch5, arch of 3chs into middle quadruple crochet between 2 picots of prev. row, ch5, sk picot and 6chs, trc3 into 1ch, ch1] x 2; sk2, trc1 + RC3
16th row – h5ch, trc3 into 1ch, ch1, sk3, trc3 into 1ch, ch4, sc1 into arch of 3chs, ch4, sk4, trc3 into 1ch, (ch1, sk3, trc3 into 1ch) x 2, ch4, sc1 into arch of 3chs, ch4, sk4, trc1 into 1ch, sk3, trc1 + RC3
17th row – h4ch, trc1, sk3, trc3 into 1ch, ch1, sk7, trc3 into 1ch, (ch1, sk3, trc3 into 1ch) x 3, ch1, sk7, trc1 into 1ch, ch1, sk3, trc3 into 1ch, ch1, sk2, trc1 + RC3
18th row – h5ch, trc3 into 1ch, (ch1, sk3, trc3 into 1ch) x 6, sk3, trc1 + RC3
19th row – h4ch, trc1, sk3, trc3 into 1ch, (ch1, sk3, trc3 into 1ch) x 3, ch5, sk3, trc3 into 1ch, ch1, sk3, trc3 into 1ch, ch1, sk2, trc1 + RC3
20th row – h5ch, trc3 into 1ch, ch1, sk3, trc3 into 1ch, ch4, sk5, sc1, ch4, sk5, trc3 into 1ch, (ch1, sk3, trc3 into 1ch) x 2, sk3, trc1 + RC3
21st row = 13th row
22nd row = 14th row
23rd row – h4ch, trc1, ch1, sk3, [trc3 into 1ch, ch5, arch of 3chs into middle quadruple crochet between 2 picots of prev. row, ch5, sk picot and 6chs, trc3 into 1ch, ch1, sk2], trc1 + RC3
24th row – h5ch, trc3 into 1ch, [ch1, sk3, trc3 into 1ch, ch4, sc1 into arch of 3chs, ch4, sk4, trc3 into 1ch, ch1, sk3, trc3 into 1ch], trc1 + RC3
25th row – h4ch, trc1, [(ch1, sk3, trc3 into 1ch) x 2, ch1, sk7, trc3 into 1ch, ch1, sk3, trc3 into 1ch], ch1, sk2, trc1 + RC3
26th row – h5ch, trc3 into 1ch, [(ch1, sk3, trc3 into 1ch) x 4], trc1

Second part of the video tutorial
Step 4
Second front part
Count 48 chs from the end of the 10th row and attach the yarn into 49th ch
11th row (wrong side) – ch3, trc1 into same ch, sk3, trc3 into 1ch, (ch1, sk3, trc3 into 1ch) x 2, [ch5, sk3, trc3 into 1ch, (ch1, sk3, trc3 into 1ch) x 3] x 2; sk3, trc1 + RC3
12th row – h4ch, trc1, sk3, trc3 into 1ch, ch1, sk3, trc3 into 1ch, [ch1, sk3, trc3 into 1ch, ch4, sk5, sc1, ch4, sk5, trc3 into 1ch, ch1, sk3, trc3 into 1ch] x 2; sk3, trc1 + RC3
13th row – h4ch, trc1, ch1, sk3, trc3 into 1ch, [ch5, sk7, (sc1, ch3, sc1) into 1ch, ch5, sk7, trc3 into 1ch, ch1, sk3, trc3 into 1ch] x 2; sk3, trc1 + RC3
14th row – h4ch, trc1, sk3, trc3 into 1ch, [ch4, flower into arch of 3chs, ch4, sk8, trc3 into 1ch] x 2; trc1 + RC3
15th row – h4ch, trc1, [ch1, sk3, trc3 into 1ch, ch5, arch of 3chs into middle quadruple crochet between 2 picots of prev. row, ch5, sk picot and 6chs, trc3 into 1ch] x 2; sk3, trc1 + RC3
16th row – h4ch, trc1, sk3, trc3 into 1ch, ch4, sc1 into arch of 3chs, ch4, sk4, trc3 into 1ch, (ch1, sk3, trc3 into 1ch) x 2, ch4, sc1 into arch of 3chs, ch4, sk4, trc1 into 1ch, ch1, sk3, trc3 into 1ch, trc1 + RC3
17th row – h4ch, trc1, (ch1, sk3, trc3 into 1ch) x 2, ch1, sk7, trc3 into 1ch, (ch1, sk3, trc3 into 1ch) x 3, ch1, sk7, trc3 into 1ch, sk3, trc1 + RC3
18th row – h4ch, trc1, sk3, trc3 into 1ch, (ch1, sk3, trc3 into 1ch) x 6, trc1 + RC3
19th row – h4ch, trc1, (ch1, sk3, trc3 into 1ch) x 2, ch5, sk3, trc3 into 1ch, (ch1, sk3, trc3 into 1ch) x 3, sk3, trc1 + RC3
20th row – h4ch, trc1, sk3, trc3 into 1ch, (ch1, sk3, trc3 into 1ch) x 2, ch4, sk5, sc1, ch4, sk5, trc3 into 1ch, ch1, sk3, trc3 into 1ch, trc1 + RC3
21st row – h4ch, trc1, ch1, sk3, trc3 into 1ch, ch5, sk7, (sc1, ch3, sc1) into 1ch, ch5, sk7, trc3 into 1ch, ch1, sk3, trc3 into 1ch, sk3, trc1 + RC3
22nd row – h4ch, trc1, sk3, trc3 into 1ch, ch4, flower into arch of 3chs, ch4, sk8, trc3 into 1ch, trc1 + RC3
23rd row – h4ch, trc1, ch1, sk3, [trc3 into 1ch, ch5, arch of 3chs into middle quadruple crochet between 2 picots of prev. row, ch5, sk picot and 6chs, trc3 into 1ch, ch1, sk3], trc1 + RC3
24th row = 24th row of 1st front part
25th row = 25th row of 1st front part
26th row = 26th row of 1st front part
Step 5
Back part
Skip 3chs from a front part and attach the yarn.
11th row (wrong side) – ch3, trc1 into same ch, sk3, trc3 into 1ch, ch1, sk3, trc3 into 1ch, [ch1, sk3, trc3 into 1ch, ch5, sk3, trc3 into 1ch, (ch1, sk3, trc3 into 1ch) x 2] to last 4chs; sk3, trc1 + RC3
You should have 3chs left to the other front part.
12th row – h4ch, trc1, sk3, trc3 into 1ch, [ch1, sk3, trc3 into 1ch, ch4, sk5, sc1, ch4, sk5, trc3 into 1ch, ch1, sk3, trc3 into 1ch] to last 4chs; sk3, trc1 + RC3
13th row – h4ch, trc1, ch1, sk3, [trc3 into 1ch, ch5, sk7, (sc1, ch3, sc1) into 1ch, ch5, sk7, trc3 into 1ch, ch1, sk3] to last 1ch; trc1 + RC3
14th row – h5ch, trc3 into 1ch, [ch4, flower into arch of 3chs, ch4, sk8, trc3 into 1ch] to last 1ch; trc1 + RC3
15, 16, 17, 18 rows = 23, 24, 25, 26 rows of 1st front part respectively
19th row – h4ch, trc1, [(ch1, sk3, trc3 into 1ch) x 2, ch5, sk3, trc3 into 1ch, ch1, sk3, trc3 into 1ch] to last 3chs; ch1, sk2, trc1 + RC3
20th row – h5ch, trc3 into 1ch, [ch1, sk3, trc3 into 1ch, ch4, sk5, sc1, ch4, sk5, trc3 into 1ch, ch1, sk3, trc3 into 1ch] to last 1ch; trc1 + RC3
Repeat the pattern starting from the 13th row
Step 6
First back shoulder piece
26th row – h5ch, trc3 into 1ch, (ch1, sk3, trc3 into 1ch) x 4, sk2, trc1 + RC3
27th row – h4ch, trc1, (ch1, sk3, trc3 into 1ch) x 4, sk2, trc1
Join back and front shoulder pieces together.
Work sl.sts down to the 25th row of the back part.
Then sc to last 21chs of the 25th row.
Step 7
Second back shoulder piece
26th row – ch3, trc1 into same ch, sk3, trc3 into 1ch, (ch1, sk3, trc3) x 4, trc1 + RC3
27th row – h4ch, trc1, (ch1, sk3, trc3 into 1ch) x 4, sk3, trc1
Join back and front shoulder pieces together.
Step 8
Finish up
Ties – chain 60, h2ch, sc to end
Edges – work hdc around all your edges
Step 9
Bottom borders
1st row – (ch7, sk5, sl.st.1) x 4, (ch7, sk4, sl.st.1) x 2, [ch7, sk5, sl.st.1] to second corner, (ch7, sk4, sl.st.1) x 2, (ch7, sk5, sl.st.1) x 4
2nd row – sl.st.4, [ch7, sl.st.1 into middle ch of an arch] to end
3rd row – sl.st.4, [ch7, (sl.st.1, ch6, picot1, ch2, sl.st.1) into middle ch of an arch] to last arch; ch7, sl.st.1 into middle ch of the arch
Cut the yarn and secure it.

Abbreviations
[ ] – repeat
arch of 3chs – (sc1, ch3, sc1) into 1ch
ch – chain
flower – [quadruple crochet 3, (picot 1, quadruple crochet 3) x 2]
h#ch – insert a hook into a 5th or 4th ch from your hook
picot – ch3 and sc into the 1st ch of the 3 chs
prev – previous
RC – returning chain
sc – single crochet
sk – skip a chain
trc – triple crochet
Crochet lace bolero jacket – two parts video tutorial

Comments
Hi Sana, I have a hard time
Hi Sana, I have a hard time to figure it out. I worked only 10 rows and started to do the front row on the 11th row. I measured my 4 inches goes to 4 rows. And my arm depth I prefer to go on 8 inches. Pls help me. Since my gauge is different I'm having hard time to figure it out.I'm almost giving up . . Thanks.
Hi Luz,
Hi Luz,
Since you will crochet just 8 front part rows and don’t need to crochet a second repeat of the pattern, I would work for the 1st front part rows 11 – 15 the same way working one repeat instead of two and adjusted rows 16 – 18 as follows:
16th row – h5ch, trc3 into 1ch, ch1, sk3, trc3 into 1ch, ch4, sc1 into arch of 3chs, ch4, sk4, trc3 into 1ch, sk3, trc1 + RC3
17th row – h4ch, trc1, sk3, trc3 into 1ch, ch1, sk7, trc3 into 1ch, ch1, sk3, trc3 into 1ch, ch1, sk2, trc1 + RC3
18th row – h5ch, trc3 into 1ch, (ch1, sk3, trc3 into 1ch) x 2, sk3, trc1 + RC3
That way you will decrease chains in all 8 front part rows.
For the back part, I would crochet rows 11 – 17 the same way working 3 repeats instead of 4. For each back shoulder piece, I’d work three trc3 into 1ch just like I ended my 18th row of the front part. Hope this will work for you. Happy crochet!
Hi Sana, I took a picture of
Hi Sana, I took a picture of my first front and I tried my best to follow what you've written up to 18th row and I need to stop because I need to know if I continue on 19th row and so on. Pls. Advise and check my picture of my 11 thru 18 . Is it correct? Thanks.
Hi Sana, Pls. check the
Hi Sana, Pls. check the picture of my 11th to 18th rows first front part if I did it right. Did I understand that I'm doing 8 front rows only right? Thanks.
Hi Luz,
Hi Luz,
It looks right to me. Whether to crochet the 19th row or not depends on your gauge. You've written that your gauge is 4 rows go into 4 inches. If that is correct, then 8 rows should be enough for each front and 9 rows for the back part (= 7 long rows + 2 short rows for each back shoulder piece). Happy crochet!
Hi Sana, Thank you for
Hi Sana, Thank you for helping me a lot. I'll do that.
Hi Sana, I was able to finish
Hi Sana, I was able to finish the back part and put the shoulder piece together and I tried it on and it's a little bit tight on my chest and shorter , but I like it, maybe next time I will make a bigger size.When I finish completely I'll show you.
I did watch the video , and
I did watch the video , and in the front part, the 12th row is the same as 4rth row, is it the row that I will stop decreasing? Pls. give me the details. Thanks.
Hi, which brand yarn did you
Hi, which brand yarn did you use for this project.. Can I use size 10 crochet thread?
Hi sarvani,
Hi sarvani,
Yes, you may use a size 10 crochet thread or any other yarn which could give you about the same gauge as I had. Happy crocheting!
Pages